
Air Sealing: “windbreaker” for your Home
By Mark Boudreau
It’s happening right now. The wind is blowing. Your house is warm or at least “warmish”. Outside, it’s cold!
You may have noticed the drapes beginning to flutter or perhaps a draft at your feet, head, or shoulders. Many drafts come from air leakage. Air leakage is not only uncomfortable, but costly and bad for the environment. We generally find that we can lower the air leakage of an average home by between 20% and 30%. This translates into significant amounts of heating fuel saved. Having a house with air leaks is like throwing money out the window!
When we test an average 2000 square-foot home, it is common to find a total of 400 square inches of leakage. That is the equivalent of having a window twenty by twenty inches open all year long, making you hotter all summer and colder all winter. Unfortunately the fix is not as simple as closing the window. The leakage happens in a wide variety of places.
Sometimes those places are very easy to spot. If you turn off your bathroom fan and hold your hand up to it, you are likely to feel a cool draft. The same is true if you hold your hand up to the bottom of an exterior door.
A breakdown of the percentages of leakage in specific areas of a typical house is provided by the US Department of Energy. It can be found at bit.ly/DOE_air_sealing_leaks.
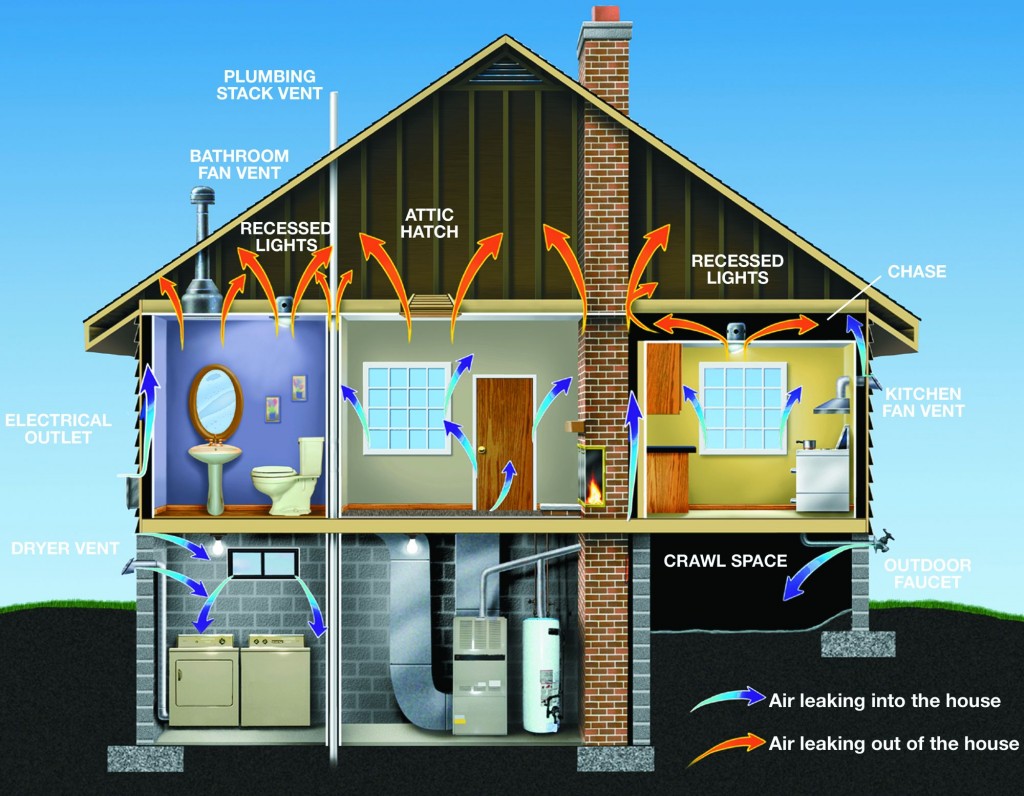 Here is a picture of leakage in a typical house, showing the common areas for leakage and air loss. Notice that cold air entering in the basement and then warm air exiting at the top of the building. This is a typical air loss profile.
As you can see, there is no one particular area that accounts for tremendous leakage in a house. It is generally a lot of small leaks that combine together to make a significant total air loss.
There is good news though. Some of the leaks are easy to fill.
Let’s look at some air leakage and infrared images. Infrared is easier than it sounds. We take a picture of temperatures on a surface and assign a color to different temperatures. Blue is cold and red to white is hot.
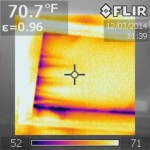 This photograph is an attic hatch. You can see the blue starbursts around the orange hatch show cold air streaming across the warm surface of the hatch and cooling the hatch off. The blue outlines where the hatch itself is sitting like a door in its frame. The hatch has no rubber gasket between it and the frame, and so air is freely leaking around the frame.
This is a really easy fix with some rubber gasket material. You could even do a temporary fix with some latex caulk if you don’t plan on going up into that attic any time soon. In both of images we are pulling cold air into the house for our test which is why you are seeing the cold air on the inside.
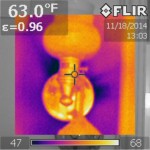 In another example, cold air is leaking around the base of a light sconce. You can see the same feathering similar to what was seen at the hatch. This light is mounted on the inside of the house but it is located on an outside wall. The light is also mounted on an electrical box that is in the wall. That electrical box has a number of holes in it. Warm air in the house can travel through the fixture, through the electrical box and outside, drawing cold air into the house. To fix this leakage is a bit more of a trick and requires some expertise with electrical wiring, so a professional may be needed.
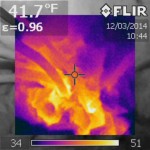 Yet another image show four wires in the attic at the place where they descend into the building’s interior walls. The blue around the perimeter of the picture is the insulation up in the cold attic. The white indicates heated air from the inside of the house that came through a wall switch on the wall below, up through the wall, and out to the attic right at this location. The electricians had to make a hole to send their wires up into the attic the hole around the wires was never caulked. So now there is a tiny chimney, at work 24 hours a day, all year, moving expensive heated air from the switch up the wire and out to the cold attic.
This is a very easy fix that most reasonably adventurous people can handle. You go up in your attic, find where the wires enter the building and seal things up with spray foam or caulk that you can get from a building supply center.
After work in the attic is done your new and tightly sealed attic can look as good as this. It is an attic which is over 30% more airtight after air sealing. It was a bit of work moving the insulation out of the way to do the air sealing, but it was well worth doing for years of heat and energy savings. It is also really great for the environment too, as it reduces the energy needed to heat the house.
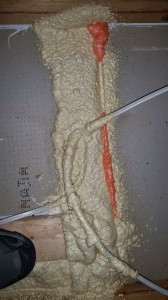 This is what the wiring looks like after all the holes have been sealed. There is no leakage and the work was pretty easy.
These are samples of the kinds of simple air sealing you can undertake in your home. If you want to deal with air leaks, it is best to get an audit from a qualified auditor first. If you want to tackle the easy work yourself make sure you sign on with an auditor who is good at explaining things and willing to coach you through some of the “low hanging fruit.” We coach folks wanting to take on DIY work all the time. It is fun and rewarding.
Finally, and perhaps most important, make sure you have a qualified and certified professional check all your work. Some air sealing can cause trouble, and even some safety issues, for you and your house. You want someone who can help you navigate around those potential problems. Make sure that any air sealing is followed up with an audit and a safety check of your heating equipment. If you tighten up your house you can create a situation where your heating equipment which requires air to operate properly will be starved of air. In this case it could take its needed air from its own chimney bringing dangerous carbon monoxide back into your house. It is reasonably easy to avoid problems when you have a certified auditor or weatherization specialist in your corner.
Mark Boudreau is co-owner of Lewis Creek Company, a full-service design-build company consisting of both trades-women and men located in North Ferrisburgh, VT. They take a holistic approach to new building and renovating, taking into account people, homes, the environment, beauty, economy, and performance.


Leave a Reply